Showing posts sorted by relevance for query label:interiors. Sort by date Show all posts

Wednesday, 25 September 2019

INTERIORS // the affordable alternative to THAT House of Hackney lamp (thanks Asda!)

Introducing the House of Hackney cheetah lamp of dreams. Something I have been fantasising about having in my home for a little longer than is normal. The caveat? The cost (isn't it always?)

The lamp base alone is an eye watering £645, whereas if you want one of their jazzy tasselled lampshades too, you'd be looking at £1,020.  I initially wanted two of them - one for each bedside table - but multiply the above by two and feel free to audibly wince like I did. I mean, WHAT


That idea quickly went out the window, but being the obsessive that I am, it never fully left my mind.
Imagine my joy when I discovered this George at Asda lookalike (granted, a bronze version).


At just £35, this is more of a price I can justify.

Sometimes gold / bronze can look a bit a naff if the quality's not right, so I'm waiting to see this in person in my local store (although saying that, reviews on the product page of the Asda website have all been promising so far!).

I'm also a huge fan of the Abigail Ahern flocked animal lamps (as seen here) which come in at £95 a pop. I haven't yet seen a cat lamp, but I'm holding out hope. Until then, how cute is this dog lamp? <3

Do you like a statement lamp as much as I do?

Tuesday, 19 February 2019

DIY // how to make a marble table

Long time readers will know that I'm partial to a bit of marble. Having had a bit of a family room makeover lately, I was on the hunt for some side tables to go with my Gatsby inspired curtains and cushions. I've been gradually starting to layer in touches of gold, copper and rose gold to add warmth to our dark inky blue walls, and I knew I wanted the side tables to be in fitting with our affordable luxe scheme.

THE SEARCH

Don't get me wrong, I saw plenty of tables online that I loved. But before you buy big furniture items, always make sure to check the dimensions and get that tape measure out. In doing so, I saved myself money (P&P is killer for furniture deliveries don't you know) and the hassle of  returning a bulky item (I discovered that one beautiful table in question wouldn't have fit the space). Specifically lots of the tables I found were knee high (Ok I exaggerate) meaning that rather than reaching across for that cup of tea, you'd have dip down into a dark corner to retrieve said cup of tea. Which is bloody stupid. Nobody got time for that.

THE SOLUTION

I came to the realisation that I wanted something that didn't exist. I couldn't find a table that was high enough (why are all tables so low??). So I took matters into my own hands and one weekend I popped into my local DIY store feeling inspired to wing it create something of my own.

Disclaimer: in light of the recent collaboration guidelines and red tape, let me make very clear that this post was written of my own accord and has not been funded or incited by B&Q in any shape or form.

SEARCH 2.0

I went to my local DIY store and picked up MDF for my table top, screws and table legs. In an ideal world I would have loved hairpin legs, but 1) our local B&Q didn't have them and 2) sometimes you need think about practicality (for example, where will your table sit?). In our case, the table would be tucked away in a corner, meaning that we couldn't justify spending more on hairpin legs, only not to see them / enjoy them fully.

We were debating leaving the wood as it was, but the labels on the MDF didn't come off particularly smoothly... so we knew there and then that we'd want to cover the table top up in some capacity.We found some great sticky back plastic / laminate designs in our local store and picked out a realistic looking marble print which we decided to try covering the table with. Here's how we achieved the final result.


YOU WILL NEED
  • 18mm MDF (sizing completely up to you)
  • 3.5 x 12mm wood screws
  • x4 table legs of your choosing (ours were these B&Q kitchen work top legs)
  • Marble sticky back plastic (or any other design of your choosing)

This was the marble we used (they also have this amazing version in black)


METHOD

1) Position your table legs where you want them (we kept some centimeters spare around the edge of the MDF so the weight was better distributed nearer the centre of the table). Mark holes for drilling.


2) Drill said holes and align the legs with the holes.

3) Screw into place using those trusty screws you picked up


4) Repeat this process for all four legs until you are left with something like this


5) Stand the table correct side up and check its stability.

6) Lay out your sticky back plastic and work out where you want the pattern to sit. Naturally Bailey had to 'help' at this stage.


7) Peel back the sticky back plastic and start one end at a time, gradually pulling as you go and smoothing out any bubbles. Don't worry if you see a crease or a bubble or two - it's easily fixable. The beauty of this material is that you can unstick and try again until you are happy with the finish.

8) Finally, leave enough excess to fold away under your table top out of sight, and trim the edges at an angle for neat corners.


THE FINAL RESULT

I was really impressed with how high end the final result looked. To me, this table reminds me of the one of the French Connection ones, but at a fraction of the cost.


I love how the table makes use of the dead space that was once in the corner of our room. It's almost like a hovering shelf. And seeing as I don't trust myself to be drilling holes into walls, it's a super easy way of getting the shelf look. Without actually being a shelf. Also feel like it was a good shout not going for the hairpin legs - it's not like you'd see them anyway!

We received some lovely coasters from my sister for our anniversary and given that she didn't know we were even building this table (let alone the design!), how spot on are these coasters??!


This table has been so handy for drinks, magazines, vases, you name it. Bailey loves it too despite me frequently telling him TABLES ARE FOR GLASSES NOT ASSES


COST DIFFERENCE

The tables I was looking at originally were £100+. Some high street supermarkets had good options below the £100 mark, but I read mixed reviews about the finish / quality and then there's that question mark, you know? Like when you find a hotel you like the look of and then a bad TripAdvisor review puts you off. All in all, the MDF, screws, laminate and table legs cost us the following:

  • MDF - £8.99
  • Screws - £1.10 for a pack of 25
  • Legs - £3.98 each
  • Marble sticky back plastic - £6.50

= £32.51 

...bear in mind that the above is an upfront cost. We didn't use the whole roll of sticky back plastic, meaning we have plenty left over for another project. And we used 16 of the 25 screws. So the actual total cost of our table is potentially less than £30 - not bad eh?

In summary, I love how we created something unique and how rewarding it was seeing it all come together. I definitely feel inspired to keep it up with the home DIY and life hacks so watch this space!

Come say hello on Instagram |  Twitter

Wednesday, 13 April 2016

Shabby chic interior design and the dreamiest of house and home images

House and home magazines have become a little bit of an obsession of mine to say the least. Last summer I found the mother of all house magazines in France. It was a guide to decorating in a "shabby chic" style and contained the sort of aesthetic I pin frequently to my house and home board on Pinterest. It was that typical blogger / Instagram house with white everything and cute, whimsical little touches. I was coming to the end of my holiday and as tempted as I was to pick up the magazine, my supermarket trolley (and not to mention suitcase!) were already plenty full with biscuits, cakes and treats galore for family and work. I literally couldn't carry much else... so I had to forgo the magazine.

Then fast forward a few months to when my folks came back from holiday (also France!). As well as a very colourful box of macarons, they'd also brought me back a selection of magazines. In amongst them were some house titles and.... you've guessed it... the shabby chic magazine! Turns out it isn't a regular publication and only comes out 2-3 times a year. So it was in fact the very same copy I'd seen on my travels! I hadn't mentioned it to them at all at the time - it was just an amazing coincidence! So without further ado, let me introduce you to Shabby Style magazine...


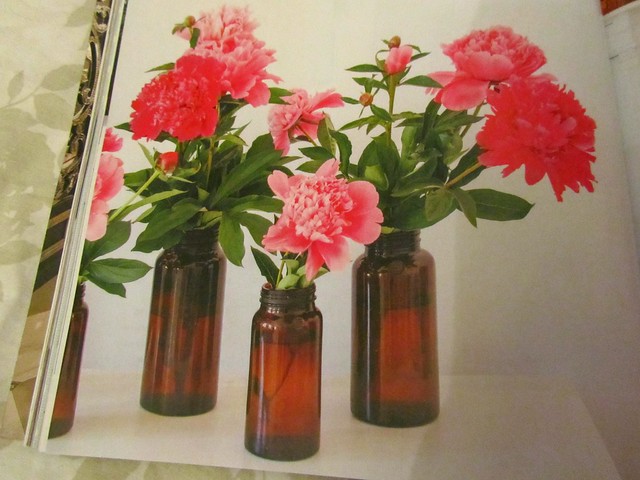
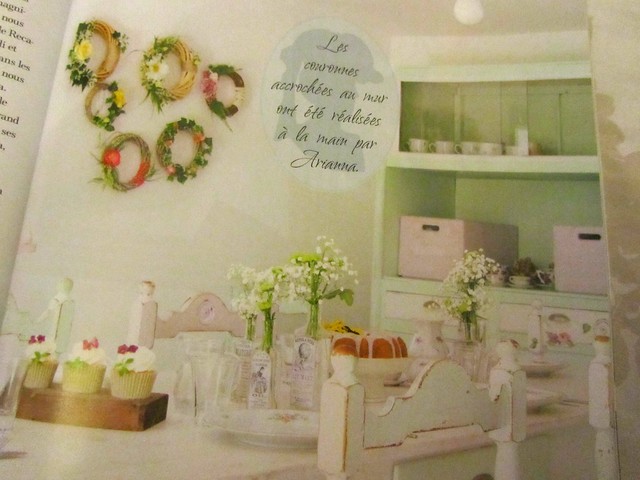
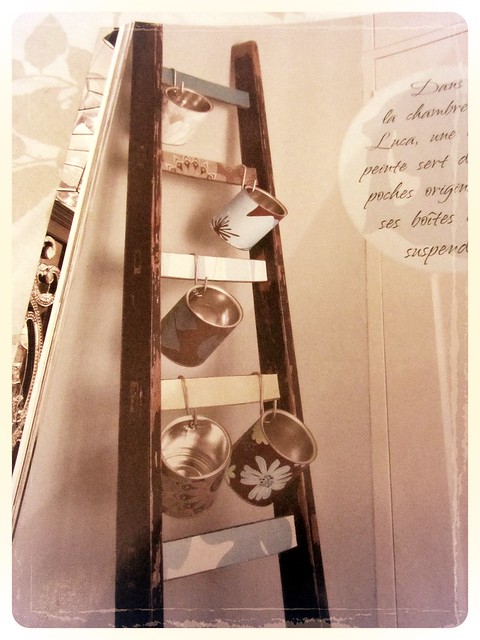
If I had to describe the aesthetic in this magazine in a few words, it'd be 'homely', 'family friendly' and 'welcoming'. You can actually imagine people living in the rooms they feature - rather than perfectly pristine houses with a you-better-not-spill-your-red-wine-on-my-brand-number-designer-rug mindset. The focus instead being on classic pieces of furniture lovingly up-cycled, as well as newer pieces of furniture intentionally bought for that more rustic(?) look. Think furniture with chipped paint, scuffs, old jars, bottles and food containers on display, ladders used as shelving, freshly picked flowers in jam jars and bottles. In summary, really chic looking, and at the same time, really French looking. I love it.


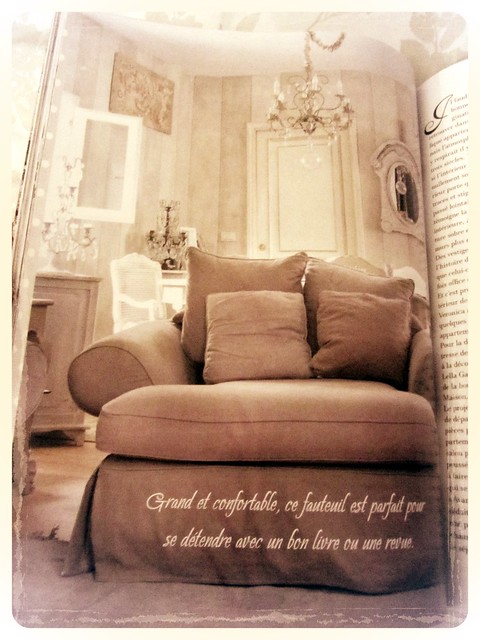
And the living room / snug / den / drawing room / lounge of my dreams:


I love the neutral colour palette with the mocha coloured sofa and the ornate details of the mirrors and chandeliers. A room like this has such a regal and calming quality to it. And the brown gives it some warmth so the colour scheme isn't too 'cold'.

Are you into the 'shabby chic' aesthetic?

Friday, 26 June 2020

9 ways to bring more light into your home

AD | This is a sponsored post but all thoughts are my own

Identify any light blocking sources

Is there anything blocking or obscuring the windows and doors in your home? Is there a large piece of furniture in the way?  Do you have too much furniture in the room? Is your furniture too dark? Is there a large tree outside? 

Once you identity the root of the problem, it can be easy to remedy.

Rearrange your furniture. Alternatively identify if there are are any pieces of furniture not being used - or not being used to their full potential - and use this as an excuse to have a clear out. Your room will instantly feel bigger and lighter. Or simply replace taller pieces with lower level items like a lower sofa or lower storage solutions like sideboards rather than floor to ceiling cupboards. Or replace darker furniture with lighter furniture. The possibilities are endless.

If there is a tree or tall shrub obscuring a window, either cut it back or move it. If it's a smaller tree or plant which you simply don't want any more, why not offer it to a friend, neighbour or family member?

And another common light blocking source... dirty windows. Run a cloth over each of your windows and inspect - the cloth will be dirtier than you think! Cleaning your windows regularly - both inside and out - will ensure that more natural light can filter through into your home and who doesn't love sparkling windows?

Image source: Logan Nolin on Unsplash

Go for lighter window fittings

Are your curtains and blinds too heavy and not working for that particular space? Consider lighter window fittings like voile curtains that flutter in the breeze, or for privacy and light in say your bathroom (or any other rooms where the neighbours can look in!) try window film. Forget traditional, boring, cloudy window film - nowadays there are lots of lovely prints and patterns out there which will allow you to add interest to your windows whilst at the same time allowing light and privacy.

Consider your colour scheme

Keeping your walls light and bright will help create a light and airy space. Avoid bright whites (which can look cold and clinical) and instead opt for off-whites, pale greys, pastels or brights like sunny yellows. Be brave. Paint isn't expensive so you can always change your mind later! 

Design a lighting scheme

Poor lighting isn't just in relation to natural light - this also extends to artificial light (think lamps and light fittings around the home). The best artificial light will enhance any natural light coming into your home rather than take away from it. Consider LED bulbs (which are 90% more energy efficient than regular bulbs) and dimmer switches or additional lighting such as sconces and table lamps, which will allow you to both soften and layer the lighting in your home.

Get clever with mirrors 

Place a large mirror on the wall opposite to or adjacent to a window to help bounce the light around the room. Same applies with glass and / or mirrored furniture which can help a smaller space feel bigger.

Go for gloss

Whether it's paint, wall tiles, floor tiles, worktops or kitchen units, glossy surfaces reflect the light (similar to the way that a mirror would). I used to hate the glossy white wall tiles in our bathroom but now I appreciate that they keep the space light and bright and make what is a small room appear much bigger. 
 
Install skylights or a sun tunnel

An instant way to brighten up an extension or a dingy hallway is to add skylights (think Velux windows) or a sun tunnel which will allow natural light to come flooding in from above.

Install bifolds or sliding doors

Another way to brighten up a new extension - or an unextended home - is by installing bifolds or sliding doors. In both cases the slim frames and large expanses of glass help draw the eye to the outside space and help frame the view. Bifold doors open up completely which can provide more of a link to the outside, however the glass panels are often narrower, meaning you get less of a picture frame effect when the doors are closed. Sliding doors on the other hand, tend to have larger panes of glass so whether open or closed, can offer a less obscured view of the outside. 

Glass is your friend

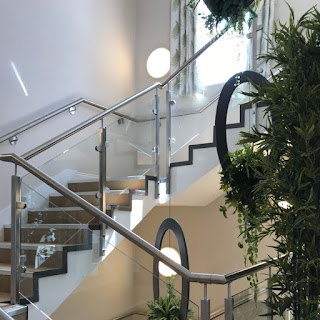
Hallways can be dingy spaces and whilst you can paint your wooden banisters and railings white, thicker banisters and railings can still be blocking precious light from filtering through the different levels of your home. One way of counteracting this is by replacing your staircase with a glass option like one of these glass balustrades from TuffX Glass so the light can pass through without any obstacles. I know from personal experience that having cats and wooden banisters is not the one (my banisters are so clawed up they could easily be mistaken for a woodworm infestation!) so the idea of having hardy metal railings or slimline glass would make our hallway look a little more polished as well as lighter and brighter!

Image source: TuffX GlassImage source: TuffX Glass

Wednesday, 9 April 2025

Loved and lost - how to cope when losing out on your dream home

Missing out on your ideal home - apartment, house, room, houseboat or other - can evoke feelings of loss comparable to that of losing someone close to you, whether through death or relationship breakdown. But instead of mourning someone, a pet, or a relationship - or even the structure itself - you mourn the life you could have had. 

We would have been happy there. 

We would have had the life we wanted there.

We would have had a better quality of life there.

And for the foreseeable future, your current situation - dwelling - may shift from technicolour to black and white, not matching up to what was almost within reach (or so you thought).

It may not feel like there's light at the end of the tunnel, but there are a few coping mechanisms that can help you through this difficult time. 


How to cope when losing out on your dream property

Don't blame yourself 

As part of the mourning process, you may think back on your experience, questioning everything you did and blame yourself for the outcome. 

What could I have done differently? 

Should I have bid higher? 

Should I have acted quicker?

Blaming yourself is so easy to do, but it doesn't help anything or anyone - least of all you. Assigning blame to yourself or your partner will wear you down, both mentally and physically. Talk to each other. Learn from the experience. Rant about the unfairness of it all over a bottle of wine. Air everything that needs to be aired and then close that chapter and move on. There will be other properties.

Something better will be around the corner

It may not feel like it right now, but trust me. When I first got onto the property ladder, after a ton of searching I found a house and I was smitten, hook line and sinker. My mind was set, there was no plan b. When we lost the house to a cash buyer, I couldn't believe how much it hurt, nor could I believe I'd ever find anything else that compared. WRONG. By waiting and having a little patience, we ended up finding something much better. Same sort of location but better, more bedrooms, loft converted and cheaper. Sometimes good things come to those who wait. 

Look again with fresh eyes

By this, I mean look at the particulars of the propery you missed out on, but with fresh eyes. Write down any potential downsides on a piece of paper and be honest. It's so easy to be caught up in the romance of house hunting and adopt rose tinted glasses, that sometimes when you look again, you may notice things you didn't pick up on before and discover that you have dodged a bullet. I did this myself with the very first property we made an offer on and lost out on, and quickly realised it wasn't as ideal as I initially thought. 

The house itself was beautifully done - possibly overdeveloped on reflection - but being realistic, we would have outgrown it quickly. The bedrooms were small and extending up into the roof wasn't possible due to the roof line. I'd loved the garden at the time, but it lacked privacy which is more important to me now than it was back then. It was overlooked by a huge block of flats and being much taller than your typical house, planting laurel or bamboo for screening would be out of the question, plus trees would take years and years before providing ample coverage. Also I know now that the area wasn't necessarily the greatest or safest, with emergency services often being called out to the flats in the middle of the night.

Sometimes looking at something anew with fresh eyes can provide a whole new perspective. 

Never give up

Keep searching. Your dream home is out there. When the right one comes along, it will all fall into place and you will forget about all the other disappointments. Much like dating, now you come to think of it. 


Image source: Richard Burlton // Unsplash

Monday, 25 June 2018

Welcome to Life // coming face to face with some of the dreamiest kitchens you will ever see!

I love a kitchen. I fantasise about the day I can have dark inky blue cabinets, white surfaces and gold cup handles. Or maybe even grey units instead of blue (the indecisiveness is real). Another side of me is open to the idea of a more pastel kitchen with units in mint or sage green. With a kitchen the possibilities are endless. But that's life. And speaking of life...


When I was invited along to Life Kitchens latest event in London, it was my idea of heaven.
An evening of looking at beautiful kitchens? Count me in!

The concept: Life aims to create ‘kitchens for living’, by designing kitchens that are built around the individual and how they live their life on a daily basis. Other kitchens out there can be style over substance and as much as I love a pretty kitchen, at the end of the day it does have to be practical for your daily needs and to suit the needs of your family as it grows.

Here were a few of my favourite things that caught my eye that night

HERB GARDEN

I love the idea of having a herb garden in the kitchen. I grow sage, rosemary and basil in the garden but would love to transport some of it inside for herbs that are within reach (particularly useful on a cold or rainy day where I don't fancy stepping outside!)


INTEGRATED HOT PLATE

I first thought this was a sink with a clear cover (my mistake!), but actually this was a hot plate incorporated into the counter top so you can keep food piping hot. This would have been useful in a household like mine where I grew up, as my Dad always used to wander off round about the time dinner was served and then he'd huff about having not-so-warm food ("don't say we didn't tell you so!")


STORAGE

For me, useful touches are things like having big cupboards and opening them to reveal a larder and a shelf with power points so you can pop your kettle / toaster / coffee machine inside. I'd love to have one of these in my upcoming kitchen re-design. They make great use of space as behind the doors you can have racks to house your spices etc.


THE BAR

... or alternatively why not dedicate part of your worktop to have your own backlit bar? The bar pictured below was the talking point of the evening with everyone crowding around it in awe. The capacity to have chilled wine and champagne nearby in the chiller underneath was a great use of space.


THOUGHTFUL LITTLE EXTRAS

I really liked the kitchen that incorporated a chalkboard wall. My shopping list currently gets stuck on the fridge, but a wall like this would help to cut down my paper usage!


IDIOSYNCRATIC WORKTOPS

That evening I saw beautiful worktops I never would have normally considered which were like art. Take this one for example.


GOLD SINK

How quirky is this gold sink? I love the idea of having a gold or rose gold tap, but a gold sink is little too much - even for me! Give me a nice white butler sink any day.


EYE CATCHING TEXTURES

This textured, almost slate-like side to this kitchen island was another detail I fell in love with


THE PIECE THAT CONVERTED ME

This grey marble-like quartz may well convert me away from my desire to have white worktops. I mean a colour like this would be a lot more practical than white, right?


AND MY FAVOURITE...

This for the record was my favoruite kitchen and the sort of thing I am looking for (although preferably a darker blue and gold cup handles not the silver ones pictured below). But having said that, after seeing the above grey marble-like surfaces, this now leaves me considering a grey worktop instead of a white one. Thoughts?


To enter the kitchens section of the showroom, you enter through a corridor with the best wallpaper known to man / woman:


The first thing you see through this corridor is not a kitchen, but the below. I loved this Life Kitchens desk  - how incredible would it be to work against a backdrop like this??! The Tom Dixon lights, the huge screen, the archway.... "Welcome to life", indeed.


One really well thought out part of the evening was various cooking stations used to demonstrate the appliances. There was a Siemens stand where the demonstrators were showing us how the ovens had different functions for all your food needs. Be it for steaming (we sampled beautiful prawn dim sum), getting your food nice and crisp (we sampled chicken with a crispy cornflake and chilli batter) or getting a good even bake on cakes (hello chocolate brownies!). Another cooking station showcased a griddle top, perfect for griddling onions, peppers and chicken for chicken and avocado fajita wraps.


Also in the showroom....  all the different colours you can choose from are on display and the range of colours is immense. I still like the idea of grey or dark blue cabinets but I have to say, their spearmint was really easy on the eye and would look stunning with white worktops, don't you think?


Also on display... a vast range of handles. I didn't know there were so many handles out there! But admittedly I'm still really drawn to gold or rose gold cup handles when I replace my kitchen.


Was the event just a case of going to a showroom, drinking bubbly and swooning over pretty kitchens? No my friends, it was not. I was pretty surprised to see a VR headset whereby visitors to the showroom, could visualise their new kitchen and see it there right in-front of them. It was incredible and added a fun, quirky and unique aspect to the looking at kitchens process.


Not only that, but that evening we were beta testing a new app with Go Film which allowed us to record video of our time there, which would later be stitched together and emailed over as a memento of the evening (this will be added to my Insta stories in due course!)

Later into the evening, all the cooking demonstrations came to a close and the last fajitas were snapped up. But this wasn't the end of the food that evening. We were really looked after and later into the evening bowls of food came around on trays, such as seabass and noodles, coconut chicken and rice, and the dreamiest chocolate ganache served in a tea cup. Also can we talk about how dreamy their copper lighting ceiling was?


If you fancy a look for yourself, the Life Kitchens showroom is located at:

Life Kitchens
213 Newnham Terrace, 
Lambeth, London 
SE1 7DR

Nearest station: 
Lambeth North

Opening times:
Monday - Saturday: 9am - 5.30pm
Sundays: Closed

Thank you so much to Life Kitchens for inviting me. I am actively looking for a replacement kitchen so this invite couldn't have come at a better time and certainly gave me lots of food for thought!